Every year, millions of people lose irreplaceable photos due to accidental phone damage, theft, or storage failure. In fact, studies show that nearly 30% of smartphone users have permanently lost photos at least once, and over 60% admit they rarely back up their devices. Learning how to back up your smartphone photos to an external hard drive is one of the smartest digital habits you can build. It protects your memories without relying solely on the cloud. This guide walks you through every step, for both Android and iPhone users.
Why Backing Up Smartphone Photos to an External Hard Drive Matters
Most people assume their photos are safe inside their phone or a cloud account. However, cloud storage plans run out, subscriptions lapse, and phones break without warning. Backing up your smartphone photos to an external hard drive gives you a physical copy you fully own and control. It also removes the stress of “low storage” notifications on your device. Think of it as your personal archive that no company can delete or charge you monthly to access.
The Risk of Relying Only on Cloud Storage
Cloud platforms like Google Photos, iCloud, and Amazon Photos are convenient but not foolproof. Service outages, account hacks, and policy changes can put your data at risk overnight. Additionally, free storage tiers are shrinking, and most users now need paid plans to store thousands of high-resolution photos. Storing your photos locally on an external drive adds a critical second layer of protection. The classic “3-2-1 backup rule” recommends three copies, on two different media, with one stored offsite.
Choosing the Right External Hard Drive for Photo Backup
Not all external drives are created equal, so picking the right one matters greatly. For photo storage, look for drives with at least 1TB of space, especially if you shoot in high resolution or 4K video. Portable SSDs like the Samsung T7, WD My Passport, or SanDisk Extreme are popular choices for speed and durability. Traditional HDDs from Seagate or Western Digital offer more storage per dollar if portability is less important. Always buy from a trusted brand and check for USB 3.0 or USB-C compatibility with your computer or phone.
How to Back Up Your Smartphone Photos to an External Hard Drive on Android
Android phones make it straightforward to transfer photos with the right cable or adapter. Start by connecting your Android phone to your computer using a USB-C cable and selecting “File Transfer” mode on your phone screen. Next, open File Explorer on Windows or Finder on Mac and navigate to your phone’s internal storage under the DCIM folder. Select all photo folders, then drag and drop them into a dedicated folder on your external hard drive. Repeat this process monthly to keep your backup current and complete.
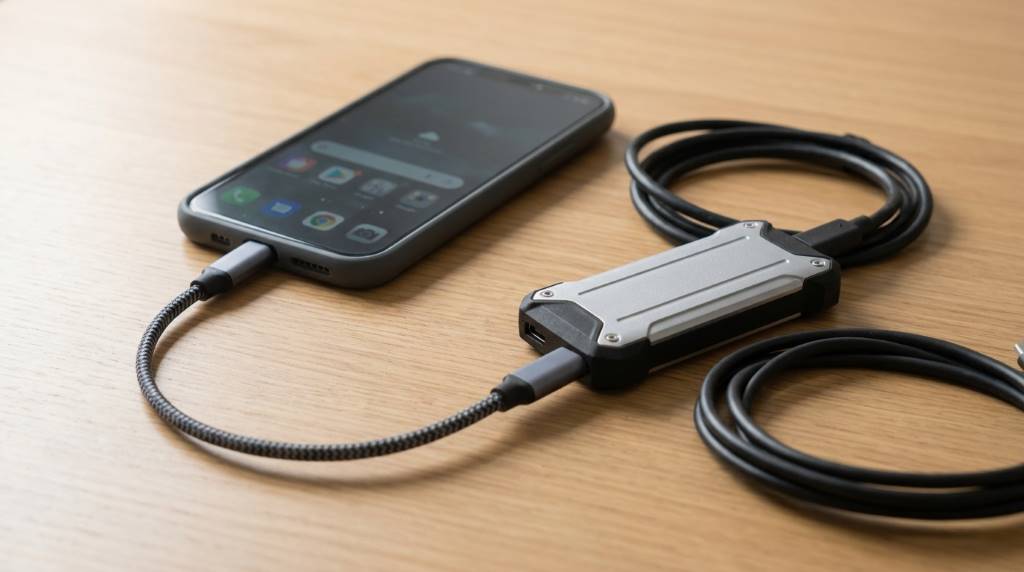
Using an OTG Adapter for Direct Transfer (Android)
If you want to skip the computer entirely, an OTG (On-The-Go) adapter lets you connect an external drive directly to your Android phone. First, plug a USB OTG adapter into your phone’s charging port, then connect the external drive to the adapter. Open your phone’s file manager app, locate the DCIM or Photos folder, and copy the files directly to the external drive. This method works well while traveling or when a computer is not available. Make sure your external drive is formatted as FAT32 or exFAT so Android can read it natively.
Automating Android Photo Backup with Apps
Several apps can automate the process of backing up your smartphone photos to an external hard drive with minimal effort. FolderSync and Autosync are popular Android apps that let you schedule automatic backups to connected drives or NAS devices. Simply install the app, choose your photo source folder, select the destination drive, and set a backup schedule. These tools run in the background and sync new photos every time the drive is connected. Automation ensures you never forget a backup and always have an up-to-date copy.
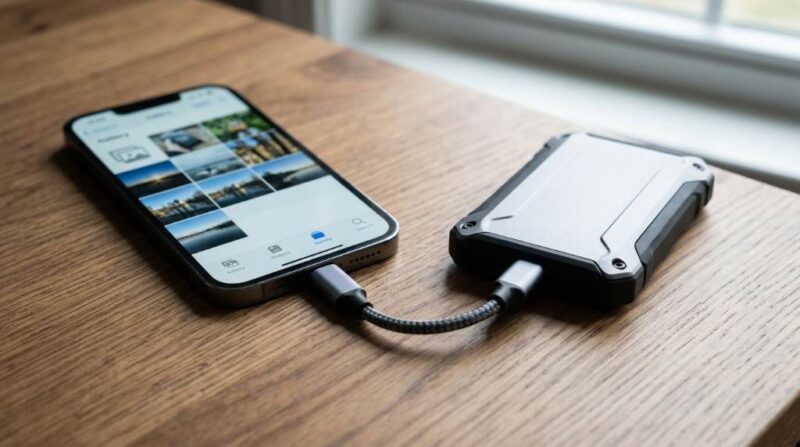
How to Back Up Your Smartphone Photos to an External Hard Drive on iPhone
iPhone users have a slightly different process, but it is equally simple with the right approach. Connect your iPhone to your Mac or Windows PC using a Lightning or USB-C cable and trust the connection when prompted. On a Mac, the Photos app will open automatically and offer an import option directly to a selected folder on your external drive. On Windows, your iPhone appears as a camera device, and you can use File Explorer to access the DCIM folder and drag photos to the drive. Always eject the drive safely after the transfer to avoid file corruption.
Using Image Capture on Mac for iPhone Backup
Mac users have a powerful built-in tool called Image Capture that makes iPhone photo transfer fast and flexible. Open Image Capture, select your iPhone from the device list on the left sidebar, and choose your external hard drive as the import destination. Click “Import All” to move every photo, or select specific albums and dates for a more targeted backup. This tool also lets you delete photos from your phone after import, freeing up valuable storage space. It is one of the cleanest ways to manage how to back up your smartphone photos to an external hard drive on Apple devices.
Third-Party Tools for iPhone Photo Backup
Several third-party applications simplify the backup process for iPhone users who want more control. iMazing is a highly rated tool that lets you back up your entire photo library to an external drive with one click. TouchCopy and AnyTrans are also solid options that organize photos by date and album structure automatically. These apps often include preview features so you can verify photos before deleting them from your phone. A paid tool is worth the investment if you manage a large photo library with thousands of files.
Organizing Your External Hard Drive for Long-Term Photo Storage
A backup is only useful if you can find what you need when it matters most. Create a clear folder structure on your external drive using a system like Year > Month > Event (for example, 2025 > July > Family Vacation). Rename folders consistently so any family member can navigate the drive without confusion. Avoid dumping everything into a single folder, which becomes impossible to search as the library grows. A well-organized drive also makes it easier to identify gaps and know when your last backup was completed.
Protecting Your External Drive from Physical Damage
External hard drives are durable, but they are not immune to physical damage from drops, heat, or moisture. Store your backup drive in a padded case or a cool, dry location away from direct sunlight. Avoid leaving drives in hot cars or humid environments, especially during summer months in states like Texas, Arizona, or Florida. Label each drive clearly with the date of the most recent backup so you always know what it contains. Consider keeping a second backup drive at a different location, such as a trusted family member’s home, for extra security.
Best Practices to Maintain a Reliable Photo Backup Routine
Consistency is the key to making any backup strategy work over the long term. Set a recurring reminder on your phone, once a month or after every major event, to back up your smartphone photos to an external hard drive. After each backup, verify the files by opening a few photos on your computer to confirm they transferred correctly. Delete duplicate files regularly to save space and keep your drive organized. A simple routine done consistently protects far more memories than a perfect system you forget to use.
Conclusion
Protecting your photos does not require expensive cloud subscriptions or complicated software. By learning how to back up your smartphone photos to an external hard drive, you take full ownership of your memories in a reliable, affordable way. Whether you use Android or iPhone, there is a straightforward method that fits your workflow and budget. Start today by choosing a quality external drive and completing your first backup this week. Your future self, and your family, will thank you for it.
Frequently Asked Questions
How often should I back up my smartphone photos to an external hard drive?
Back up your photos at least once a month, or immediately after any major event like a trip or celebration.
Can I connect an external hard drive directly to my iPhone without a computer?
Yes, iPhone users with a USB-C port or a Lightning-to-USB adapter can connect certain drives directly using the Apple Files app.
What is the best external hard drive for backing up smartphone photos?
The Samsung T7 SSD, WD My Passport, and Seagate Backup Plus are consistently top-rated for reliability and speed.
Does backing up photos to an external drive delete them from my phone?
No, copying photos to an external drive does not delete them from your phone unless you manually remove them afterward.
Is it safe to store all my photos on one external hard drive?
It is safer to keep at least two backup copies on separate drives or locations to protect against drive failure or loss.